


My poor card blog here sure looks lacking doesn't it? Well back end of June we had to literally pack up the whole house and put it in storage because we were having the whole house renovated while we went on holiday. Here it is September and the house still isn't finished. Mostly it's just deocrating and putting stuff back into the house which has been happening slowly. My craft room is the LAST on the agenda...which stinks but when it's done I hope it will be a good start to getting some card and crafts made. I use mostly printable and digi stamps so I don't need tons of stuff but I really want to get the room organised for crafting! Right now the room if full of trash that needs to go to the tip, furniture we don't have room for and storage boxes...UGH! I hope to make a little space in my new kitchen so I can at least do a little something until my craft room is ready. I'm going stir crazy for my glue and paper trimmer...lol.
In the meantime, there is some blog candy I want to win...check out Di's Designs over at the left side. And you all have a great day!
Hugs, Dorothy
Sunday, September 19, 2010
Sunday, June 13, 2010
Contest & Challenge Cards
I've been really lazy about making cards lately but I've recently gotten back into the swing of things. The weather here got very warm and it's just too nice to stay inside...lol. I have a very good reason to get back into the craft room. It was my hubby's birthday Friday and I wanted to make him a card as usual. I was surfing one night last week and came across 2 sites/blogs that piqued my interest.
First was a site I got onto from an advert on a blog called Persnickety Prints. Then I saw that Deena Rutter was having a layout contest for digital scrapbooking. She required that you use this one digital kit she gave you free, create a LO and then post on her blog to enter. So I downloaded the kit and printed out some paper and elements and decided to do a hybrid card for my hubby with it instead of a LO.
Second site was the challenge blog of Card Positioning Systems. The provided a card sketch for a design to follow for this week's challenge so I used that. With this one card I am entering both of these challenges today. Wish me luck!
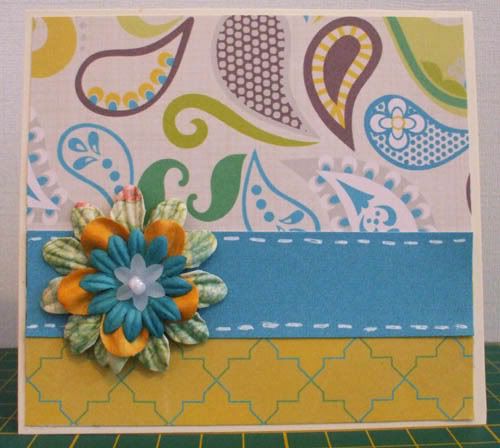
Here is my hubby's birthday card...he was really pleased with it. Made with Scarborough Fair by Deena Rutter and sketch by Card Positioning Systems:
I used a blank 5" x 5" white card and trimmed out the papers and some matching turquoise Coredinations cardstock. I did a little editing and arranging of the papers and elements in Photoshop first. I also created the elements for the inside of the card as well as the personalised messages on the front and inside. The elemets are on 3D foam pads for dimension. To the front I added a few gems and I hand stitched with a Copic marker in brown. ..this is why the faux stitching is a bit fat and wonky. Copic markers have softer tips so I was afraid to push down to hard so I had to lightly swish on the dashes which gave me less control.
 Here's the inside of the card:
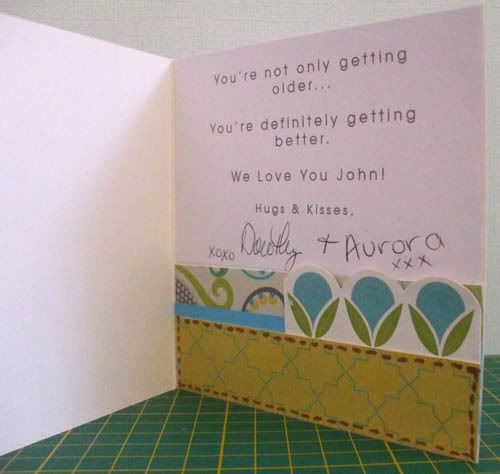
I had some left over bits so I made a little extra square card to have on hand just in case I need one fast. I didn't put a sentiment on this one yet. When I need it I will add it then as I do not know exactly what I'm using ot for yet...lol. I used some of the bits of printed paper and the cardstock again on a beige 4" x 4" card blank. I then stiched together 3 Prima flowers together with a little white plastic flower and white pearl. Lastly I added faux stitching with a white gel pen (which was a little dried out).
Thanks for looking at my cards...hope you like them!
Hugs, Dorothy
Wednesday, May 12, 2010
More Candy!!
Wow this looks like a fab candy offer here...gosh I wanna win something..lol.

You just HAVE TO go her blog to see the fantastic list of everything in this blog candy. And a big Happy Birthday to Debbie..what a fab way to celebrate. Go here to her blog to see the details:
PASSION FOR CRAFTS
Hope you all have a great day!
Hugs, Dorothy
You just HAVE TO go her blog to see the fantastic list of everything in this blog candy. And a big Happy Birthday to Debbie..what a fab way to celebrate. Go here to her blog to see the details:
PASSION FOR CRAFTS
Hope you all have a great day!
Hugs, Dorothy
Monday, May 10, 2010
It's Candy Time!
Want a chance to win this big bunch of goodies?
 Then what you have to do is go visit CraftyC's blog to find out how.
The closing date is SUNDAY 16TH MAY.
 Then what you have to do is go visit CraftyC's blog to find out how.
The closing date is SUNDAY 16TH MAY.
Monday, May 3, 2010
TWEET Cards
It's Bank Holiday Monday here in the UK and the weather has been a bit weird. This morning it was sunny, then windy and rainy...we got some hailstones. Now the sun is back out again. LOL It was a good excuse to get into my craft room and make a few cards. I printed off my Tweet digital stamps and made a couple of cards. I will post other cards I made with other printables tomorrow. I'm also working on a fold out book but I wanted to seal it so I waited to get some Mod Podge which I bought this weekend along with a bunch of other stuff from The Range's craft department. I'll finish that up this week. Here are my Tweet cards:
This first card started with an A5 green card base. I printed out two papers from my A Birdie Told ME digital scrap kit on 160 gsm card. One paper is purple with the tweet birdies on it and the other is a bright green stripe. I coloured my bird in with my Copics. I also added the TWEET word art to a tab tag from the same digital scrap kit. I did this in Photoshop. I assembled it with layers of yellow and green cardstock which I ran through my Cuttlebug using the diamond pattern embossing folder. Last but not least were some yellow gemstones and rounded corners.

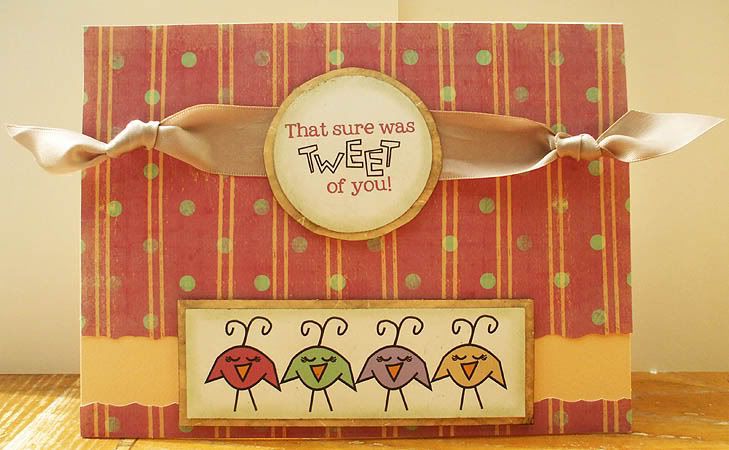
This next card started with an A5 yellow card base. I opened the TWEET word art digital stamp in Photoshop and added more text to it so it would fit into a 2" circle. The pink striped paper and the line of birds are both from my A Birdie Told Me digital scrap kitI printed those out on white card. I cut out the circle stamp and birds and layered them on yellow card then I inked the edges. I used my Purple Cow cutter witha scalloped blade and trimmed the paper bottom edge off so there was two pieces and I glued them on the card leaving a space between them. The birdies and sentiment and on foam pads. I was going to add a bow and straight ribbon but I didn't have enough of this remnant so I just knotted the ends...it looks pretty nice so it was a good idea...lol.
Thanks so much for looking at my cards!
Tuesday, April 27, 2010
Wonky Cards
I call myself the Queen of Wonky. These cards are a prime example why...lol. I have a really hard time getting things centred and straight when I put together my cards. I do have a legitimate reason though...I'm too short.
I'm a paraplegic...I sit in a wheelchair and cannot stand up. Most tables and counters are too high for me to get myself up high enough to see straight down onto a card or tag to see how I'm aligning things...hence WONKY! But I still enjoy making cards so those who receive my cards will need to able to enjoy the "handmade" quality to them...lol. here are some of my latest cards:
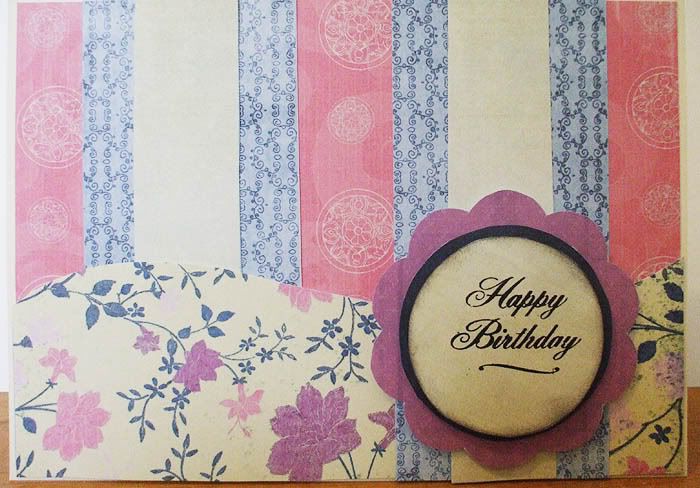
This one was created using on my of free card templates. And I used digital papers that I designed myself and printed off with my Epsom Ink Jet printer, cut out the pieces and assembled them on a beige A6 card. See my wonky Happy Birthday stamping? UGH
This card is using my wildflower digital stamp that I coloured in with watercolour pencil then used my trusty water brush to paint over it. (See my little pink smudge?) I have this cool Purple Cow paper trimmer that has 15 different edged cutting blades. I used a large scalloped one to trim shiny purple paper and DCWV floral glittered card stock for the matting and layering. I attached a pink ribbon and bow and notice I inked the edges of the digital stamp and floral paper. Then I got out a needle and thread and stitched on some little plastic flowers with a bead. I also stitched one on the bow as well. This one isn't too wonky...lol.

Thanks for looking at my cards!
I'm a paraplegic...I sit in a wheelchair and cannot stand up. Most tables and counters are too high for me to get myself up high enough to see straight down onto a card or tag to see how I'm aligning things...hence WONKY! But I still enjoy making cards so those who receive my cards will need to able to enjoy the "handmade" quality to them...lol. here are some of my latest cards:
This one was created using on my of free card templates. And I used digital papers that I designed myself and printed off with my Epsom Ink Jet printer, cut out the pieces and assembled them on a beige A6 card. See my wonky Happy Birthday stamping? UGH
This card is using my wildflower digital stamp that I coloured in with watercolour pencil then used my trusty water brush to paint over it. (See my little pink smudge?) I have this cool Purple Cow paper trimmer that has 15 different edged cutting blades. I used a large scalloped one to trim shiny purple paper and DCWV floral glittered card stock for the matting and layering. I attached a pink ribbon and bow and notice I inked the edges of the digital stamp and floral paper. Then I got out a needle and thread and stitched on some little plastic flowers with a bead. I also stitched one on the bow as well. This one isn't too wonky...lol.
Thanks for looking at my cards!
Wednesday, March 31, 2010
New Cards I Made
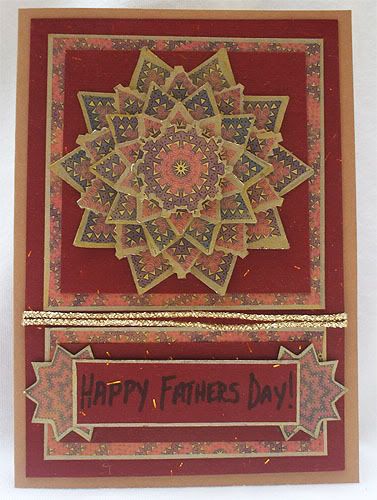
Well I had a chance to sit and make some cards last night. I decided to print off some of my mandala sheet designs and make a few cards from them. They turned our super cute so I thought I would show them off. I didn't do any fancy techniques here. I cut printed out the sheets, cut them out with scissors and trimmer then glued them together so anyone can make these.
This first card was made with my Autumn Colours Mandala sheet. I used a dark tan card base and matted the mandala paper with dark red paper that had these tiny foil pieces in it which you can really notice in the Father's Day sentiment topper. I edged the paper and the stacked mandala parts with gold ink and added a goil braid trim.
 This next card was made using my Blue Green Plaid sheet. Here's a white square card with white and blue card matting with the blue plaid paper. The mandala stackers and congrats topper are on 3d foam for a raised effect. Just added a couple of ribbon knots as well.
 Last but not least is this card made with my Dark Blue Star sheet. Again really easy....I used the dark blue star paper on the bottom and some leather textured grey blue paper on the top of a white card base. I added the gingham ribbon across the card. I mixed a couple of silk flowers in with the mandala stackers..all raised on 3d foam pads...so is the little mandala and sentiment.
Wednesday, March 24, 2010
I've Been Featured!
WOW this is pretty cool. One of my cards was picked up and featured at Popular Crafts' magazine website. They have a listing of great Easter time crafting buys and they featured my Scruffy Bunny and Eggs Easter card shown below. I am so happy my work was recognised. Check out the site where I'm featured here:
http://www.popularcrafts.com/news/article.asp?a=6197
Thank you Popular Crafts!! I appreciate it so much!

http://www.popularcrafts.com/news/article.asp?a=6197
Thank you Popular Crafts!! I appreciate it so much!
Monday, March 22, 2010
Colouring Session
My daughter and I had a colouring session and I made a few cards from our results. We used my Scruffy Easter Bunny Digital Stamp set. They sure turned our cute...hope you think so too!
This first card is the egg from the set. My daughter coloured the egg with my Copics...we both are learning how to use them though...lol. I made the card. I used a back card base them layered blue and black cardstock with with orange and pink glitter fibre paper that I got in a stack at Hobbycraft. I added the blue card around the egg as well. I printed out the sentiment myself.

My daughter also coloured in this Scruffy Bunny with my Copics. I made the card with a mettalic brown base card. The tan card layers is cool. It's very thick fabric feeling card and all wrinkly with tiny sparkles in it which you can't really see in the photo. I didn't have any matching pink cardstock so I trimmed a bit of white card with a fancy edge and used the pink Copic over the edges. The ribbon matched exactly though..which I got at my local market. There is a haberdashery stall and she has a big basket of ribbons and trims all 3 bunches for £1.00. Each bunch is between 4-5 metres! I have tons of this lovely pink satin ribbon left for future projects.

Last one I primise...lol. I printed out the Scruffy bunny and 3 of the eggs which I resized lots smaller. This is a nice big card. My mate Julie bought me some card stock for Christmas and some of it was glittery. I used the pretty pink one cut to A4 size which is folded in half. The plaid paper is from a KC&Co paster paper stack I bought 2 years ago. The yellow & pink papers are a Mulberry type paper again from my stash. All stamps are coloured in by me with my new Copics...still going through lots of You Tube vids to learn how to use them better. I printed the sentiment topper. Green dotted ribbon from Hobbycraft.
Thanks for looking at the cards...hope you enjoyed them!
This first card is the egg from the set. My daughter coloured the egg with my Copics...we both are learning how to use them though...lol. I made the card. I used a back card base them layered blue and black cardstock with with orange and pink glitter fibre paper that I got in a stack at Hobbycraft. I added the blue card around the egg as well. I printed out the sentiment myself.
My daughter also coloured in this Scruffy Bunny with my Copics. I made the card with a mettalic brown base card. The tan card layers is cool. It's very thick fabric feeling card and all wrinkly with tiny sparkles in it which you can't really see in the photo. I didn't have any matching pink cardstock so I trimmed a bit of white card with a fancy edge and used the pink Copic over the edges. The ribbon matched exactly though..which I got at my local market. There is a haberdashery stall and she has a big basket of ribbons and trims all 3 bunches for £1.00. Each bunch is between 4-5 metres! I have tons of this lovely pink satin ribbon left for future projects.
Last one I primise...lol. I printed out the Scruffy bunny and 3 of the eggs which I resized lots smaller. This is a nice big card. My mate Julie bought me some card stock for Christmas and some of it was glittery. I used the pretty pink one cut to A4 size which is folded in half. The plaid paper is from a KC&Co paster paper stack I bought 2 years ago. The yellow & pink papers are a Mulberry type paper again from my stash. All stamps are coloured in by me with my new Copics...still going through lots of You Tube vids to learn how to use them better. I printed the sentiment topper. Green dotted ribbon from Hobbycraft.
Thanks for looking at the cards...hope you enjoyed them!
Subscribe to:
Posts (Atom)